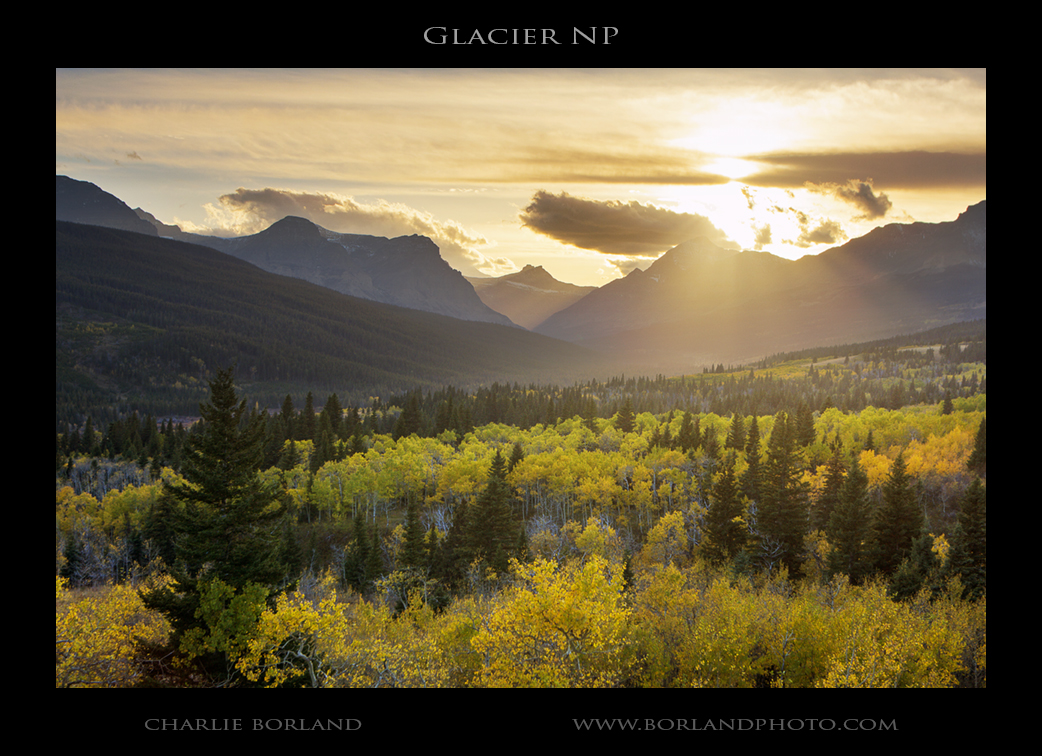
A month ago on the return trip from Canada’s NW Territories, I was zipping down the east side of Glacier NP in Montana when this event happened. The sun peeked out and I stopped, grabbed the camera and ran up a hill to get above the trees. It’s a hand-held and I started with HDR processing and applied that lightly and then did more exposure blending from the original RAW file.
The goal was to not have a sky that was over saturated and darker than the foreground or it would look unreal. I think I pushed right up to the fence so to speak as this has the look of a graduated ND filter.
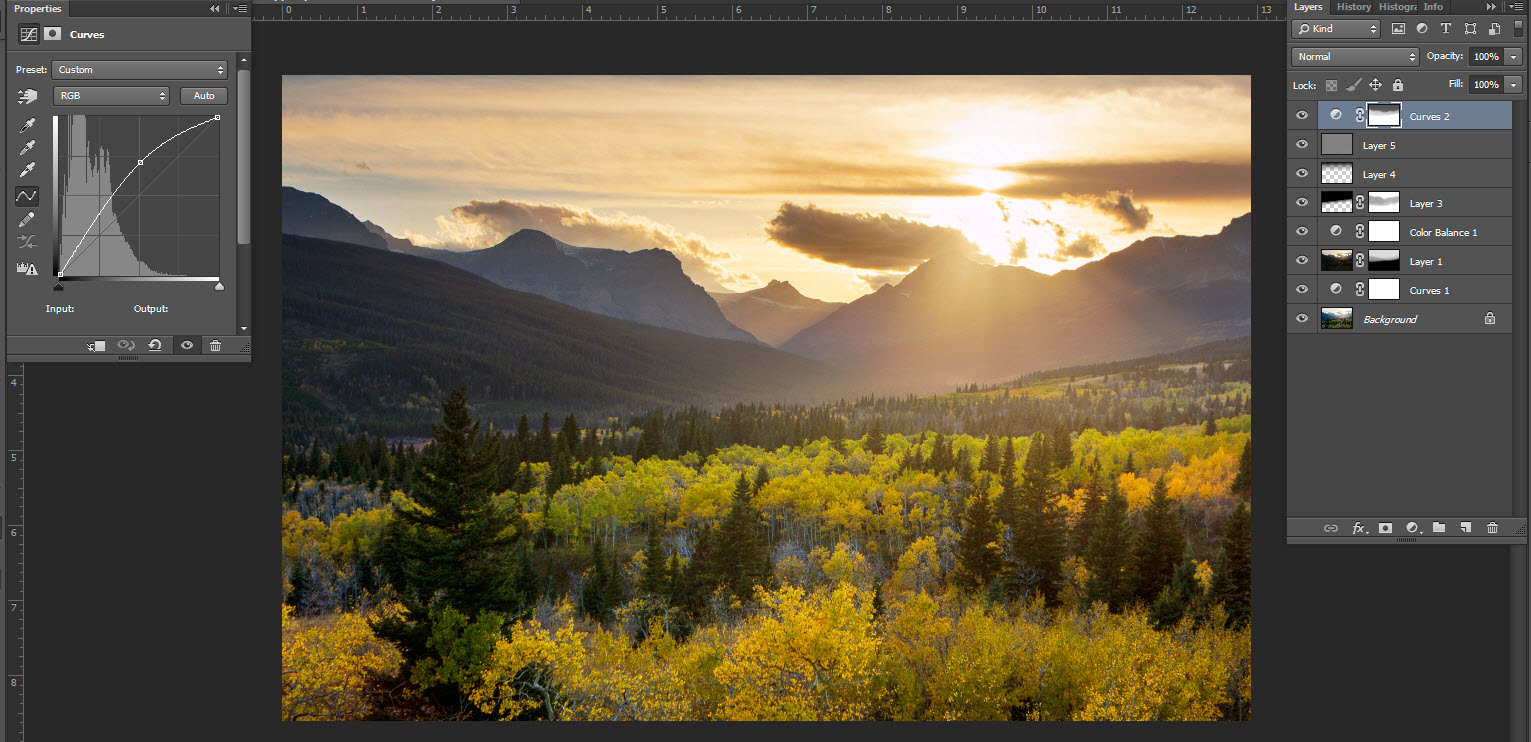
See the Photoshop layers below
1) I HDR’d three exposures: -2, N, +2 and processed it to look as natural as possible.
2) I opened in PS and first added a curves adj layer to add a little pop.
3) I processed the -2 RAW file to get the best sky i could, the stacked it into the layers stack and blended the darker sky and furthest hills slightly. I then lowered the Opacity of that layer until it looked nicely blended.
4) There was too much blue color to the HDR’df images so I added a Color Balance layer and added red and yellow to simulate warm late light.
5) I then added a graduated filter effect on the sky to bring it down even more and brushed out the furthest mountains to darken just the sky. Then I played with Opacity to find the right balance and it was 50%.
6) I then added another graduated filter that was shorter and covered only the top of the sky. I set the opacity to 35% here.
7) The foreground aspens lacked snap to them so I added a curves adjustment layer and added that snap into the foreground and I brushed out the sky on the mask to keep the contrast addition to only the trees.
8) I finished with a sharpening layer using my favorite: High Pass.
This may be an unconventional approach but that is how I work: add to taste!
Signup for my mail list on the right. Get my ebook above. And see my online courses on the right also.


