As I was hiking the desert this last winter, I spotted an area where rain had collected and created this pattern. What I thought was very interesting was how the mud was totally wet and then following the cracks, totally dry. It made for a nice composition was my feeling and I shot it with an iPhone.
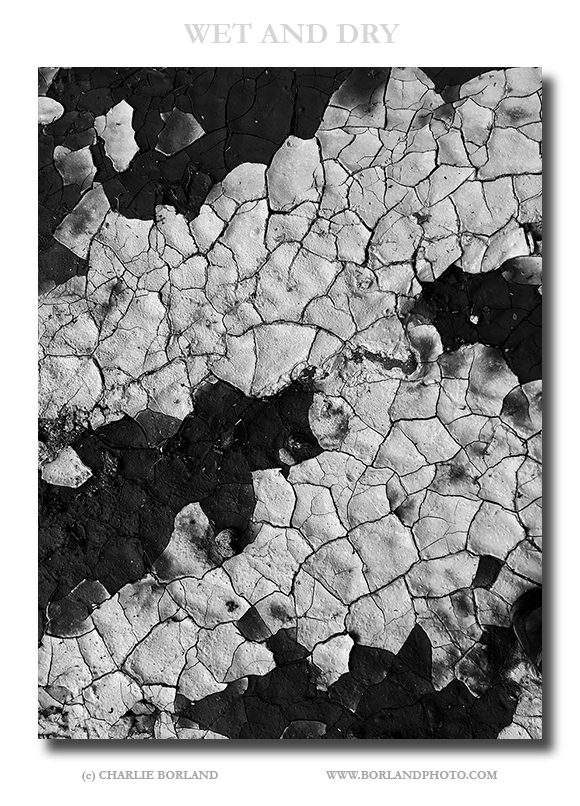
But you can see by this pre-processed image below, the photo would not work without some good processing since it was totally flat looking.
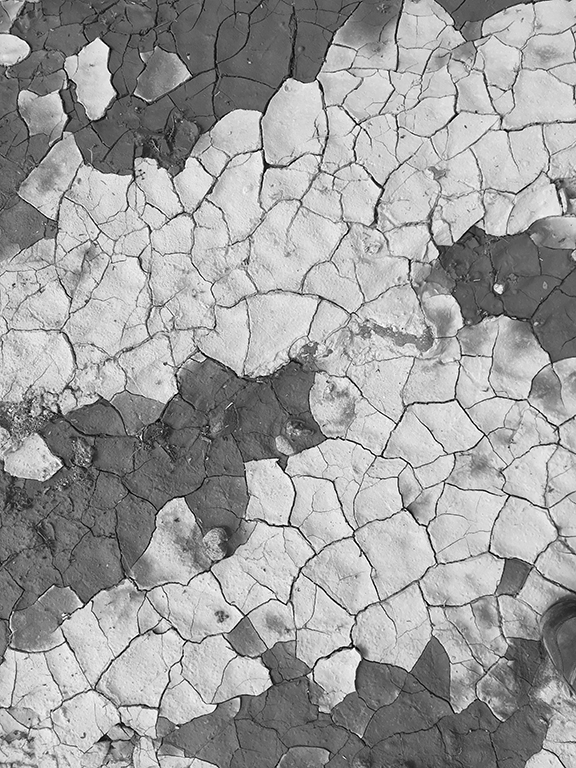
I started by converting it to B&W in Camera RAW since there was really no color.
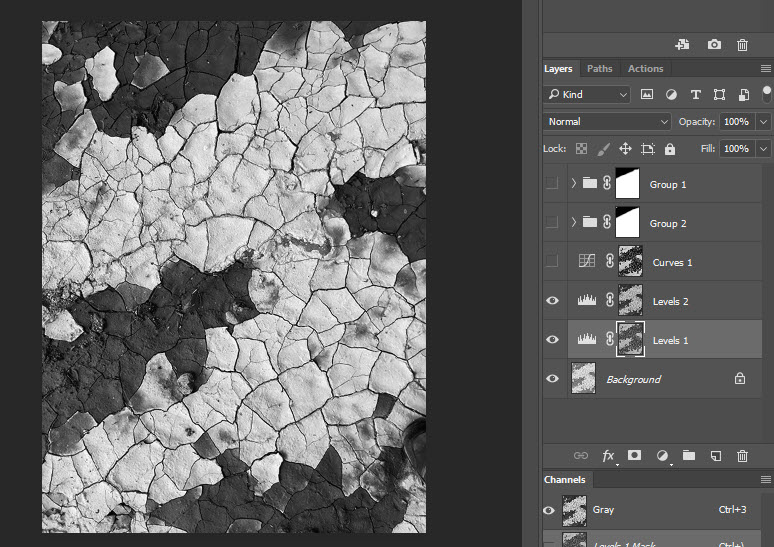
I next created a luminosity mask attached to a Levels Adjustment Layer (above) and set the B&W points.
I admit that processing is a lot of trial and error for me as I usually keep adding layers of adjustment until I like what I see. This means that I have more layers than I need, but it’s ‘the journey approach’ to processing because I don’t know where I am going sometimes until I get there.
On the above image, you will see a second Levels Adjustment Layer attached to a Luminosity Mask. It’s the same mask as the previous layer, copied from the first layer to the second layer but holding down ALT and dragging the mask to the new layer.
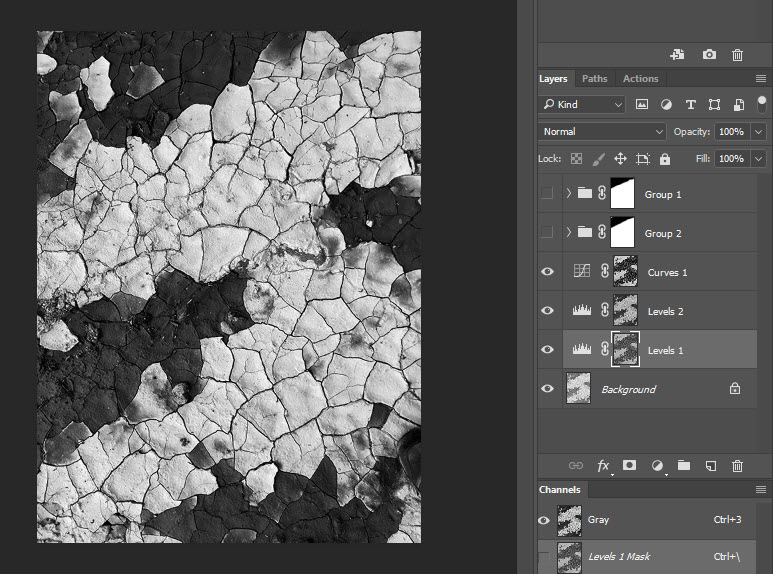
In the above image, I added a Curves Adj Layer and copied again, the same Luminosity Mask over this layer. The idea was to add more contrast and also darken the wet (black) mud. In fact, I wanted to push the wet muds tone as close to black as I could and still maintain good detail. As I did this I saw that the wet/black mud at the very top went darker than the mud in the middle and bottom.
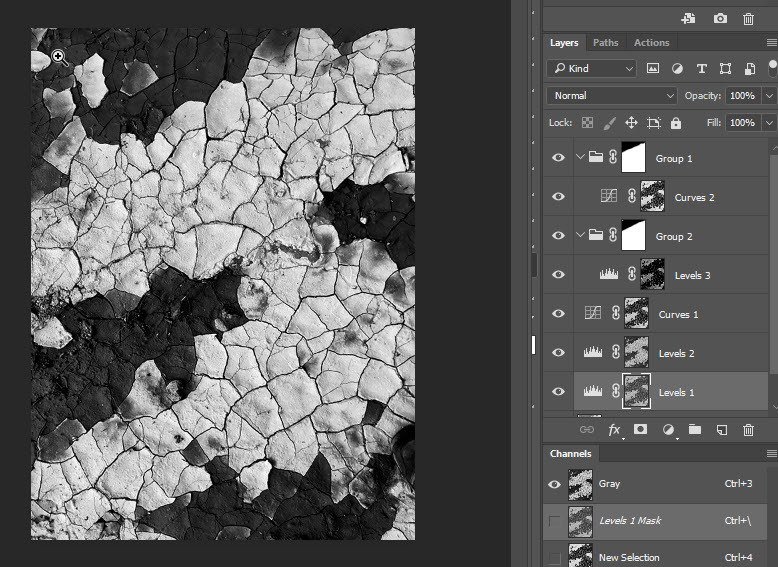
Since I want the bright tones and dark tones to be equal in brightness, I added the Levels 3 layer with again, the same luminosity mask copied to the layer. The goal was to even out the brightness levels for the dark and light tones.
Since the brighter and darker tones were brighter at the bottom than the top of the image, I went ahead and darkened the bottom half of the image to be the same brightness as the top of the image. The way to get that evenness was to create a new Group and add the levels adj layer to the group.
The reason was you cannot ‘mask the mask’ so to speak with a Luminosity mask. Instead, you add the Curves Layer to the new Group and then can add a layer mask to that group, and brush back with a black brush, the darker top of the image. So what that means is, the top of the image brightness was perfect but the bottom to bright.
So to recap, the top of the image brightness was perfect but the bottom was too bright. So I add that Curves Adj layer to darken the bottom of the image to match the top. But, the top went dark when I darkened the bottom, so I created the group, added the Curves Layer to the group, then added a layer mask and painted black at the top to remove the Curves adjustments effect on the top of the image.
Next, I added another Levels Adj Layer with the same mask to a new Group and then darkened and added a bit more contrast, before adding the layer mask to the group to mask the top with the goal for even tones top to bottom.
I admit, I probably have too many layers but again, it’s a journey where I pile on layers til I get to an image I like.
Enjoy!
Related: Photographing Wahweap Towers, Old Truck in the Desert
Learn photography online:
