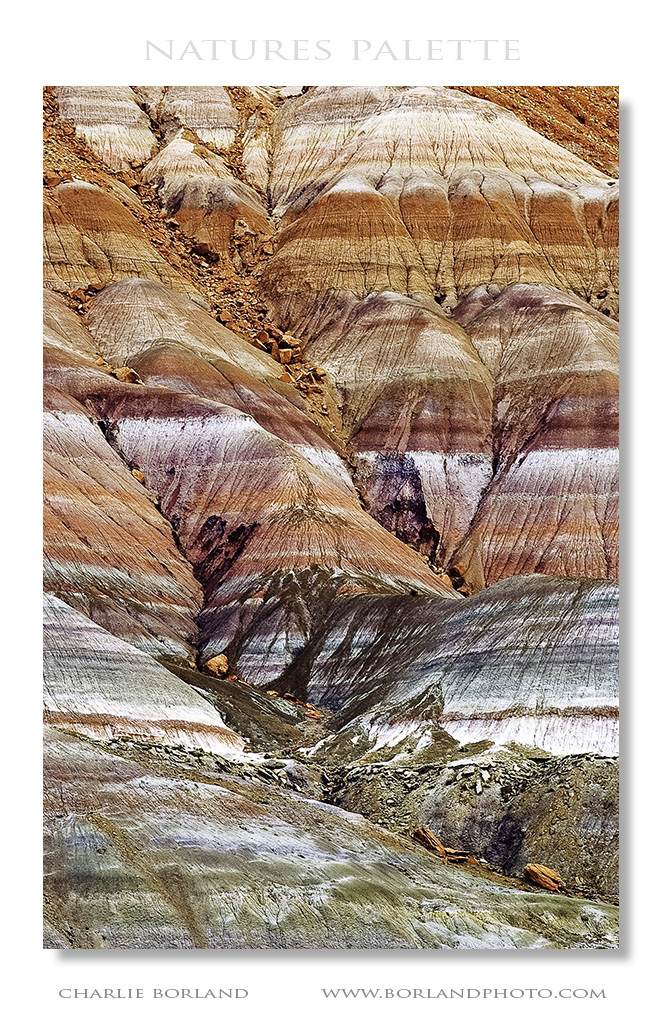
It is amazing what Mother Nature provides for our cameras. I looked at this scene and wondered what was happening on Earth to make all these colorful layers? The multitude of colors, i presume, means some specific mineral was ‘spewing’ all over for a while before another mineral came along. It’s fascinating! Any geologists out there?

When you think of creating great compositions, scenes like this dont make it hard. There is not only lines and diagonals adding to the composition, but the horizontal layers as well. There is contrast as well but it’s not lighting. Instead, I call it color contrast: a full range of colors both dark and light bring contrast to the scene. If it was converted to B&W it would have tonal contrast.

This is southern Utah due north of Page, AZ. Shot with a Canon 5D and 80-200mm lens

The eroded hills near Pareah, Utah   Join my mail list on the right side. Get my eBook above. Checkout my online photography course: How to Be a Professional Outdoor & Nature Photographer.

It has been a few years (too many) since my last Grand Canyon rafting trip where I shot this image. It is Granite Rapid which is pretty ‘hefty’ as you can see here. I am standing on the bank of the river and shot this with a 200mm lens.

Most of our rafts and kaykers stop and watch each boat go through one at a time, for photos and safety. There is a sweep boat ‘eddied’ out below the rapid to pick up anyone should a raft flip in the rapid, also for safety reasons. This is one of many large and powerful rapids in the Grand Canyon.

Granite Rapid, Grand Canyon

When I do a trip like this I usually am limited with the amount of gear I can take so I pack my cameras and lenses in Pelican waterproof cases. I take one tripod and one light stand and put those in a small duffel bag. I have another Pelican with flashes, storage devices, cleanibng accessories, and more as well as batteries and lots of them.

Rafting the Grand canyon is a life changing event! If you have done it you know what I mean and if you have not, add it to the bucket list. You will be glad you did!

Join my mailist, grab my ebook here, and check out my online courses on the sidebar.


I am excited to announce I will be teaching a 2 days Landscape Photography workshop August 15th and 16th at the Cascade Center of Photography in Bend, Oregon. The workshop is called Light on the Land and will include some classroom instruction and plenty of outdoor shooting in beautiful Central Oregon.

light on the land

You can view the workshop here: http://www.ccophoto.com/light-on-the-land/

If you are interested dont wait long as these sell out quickly.

Concept!

Without a doubt concept is the biggest ingredient in a top selling stock photo. This image screams farming, agriculture, Heartland, and more, and has made good money.

 wheat farmer

I was actually on assignment for the former America West airlines when I was shooting this guys cornfield. He drove up and asked what I was up to. We chatted and later became friends and I was invited to photograph anytime I wanted including wheat harvest where we set up this photo.

It was shot before sunset so it had the golden light of the setting sun. Having them in the foreground with the combine in back added a great sense of depth. It has been on brochure covers, bank ads, and more.

Here is a fun and lively portrait of Chelsea photographed against a white background. I used a large Octabox and two umbrellas on the background. The key to great white backgrounds is having them about 2 stops brighter than the light on the subject and no more than that.chelsea_6

Here is the light diagram:

LightingSetup


Want to learn more? Take my portrait course for $22 about 70% off. Use coupon code FB22 and click here: http://greatphotographycourses.net/mastering-studio-portraiture/

At some point a bird walked by and left these imprints on the wet sandy beach. Birds are foragers, always looking for something to eat that will sustain them. I as well am a forager, always searching for something to feed my craving to create. It’s a never ending hunger. Photography sustains me!

ca_beach_prints_b
Captured with a Nikon point and shoot and processed in Photoshop and Topaz Adjust. One of the things I do when I look at something like this is to find angles or rotate the camera to create impact to the lines that are in the scene. The footprints were going in one direction so by positioning the camera to make those footprints come from one corner up to the other, more drama is created in the composition.

Be sure and check out my eBook by clicking the link at the top. 

And I have fabulous online courses, as you can see on the right.

A couple of nights ago I was out filming and photographing in Arizona’s Kofa Mountain area. I was actually filming for a new introduction video I was making for a new place I am going to be teaching and mentoring photographers. 

My focus was on the video clips, but when the light became golden right before sunset, I had to stop filming and start photographing and this is the result. There was no adjustment to the raw file as far as color at all. This ‘sweet light’ was all natural. I only added a hint of contrast, like I almost always have to do, and a bit of sharpening. Mostly a straight shot. 

az_kofa_nwr_MG_5952

I have thing for photographing through windows of old west ghost towns and taking pictures through the old glass. I get my lens as close as I can to the glass without risking damage, then shade the lens as best I can to remove external reflections , and bracket exposures like crazy.

Here is the barbershop in Randsburg, CA shot a few weeks ago. You can see some of the outside reflections around the left side and that is due to my hands not blocking all the glare. I shot a two image pano: left and right side as vertical images, then let Photoshop stitch them. Next I went into Photomatix and gave it a medium HDR grunge look. Then opened in Topaz B&W Effects and used the filter: Flavescent which added the yellowed newspaper look I wanted. I finished with another layer using the Blueprint effect and set that to 30% opacity to add a dark edginess.

ca_randsburg_MG_6394-7_pano_tonemapped-

When I like what I created, I abandon it for the next image. 

Join my mail list, get my ebook, or see my online photo courses, all here on this page.


As I pass through Las Vegas on my way to Arizona for the warm winter months, I cant help but stop in Vegas and do a little shooting. This image is from the Fremont Street area, which has been totally revitalized since my first visit to Las Vegas in 1985. 

One of the cool things they have been doing here is preserving the old neon signs from hotels and motels that are no longer standing. So right outside the Fremont Experience areas are these awesome old signs and symbols. 

nv_vegas_fremont_st_MG_4968

So I shot the old sign, hand held by the way, and opened in ACR where I added a little contrast, lightened shadows, tiny bit of Clarity, Vibrance, and Saturation. Then I opened in Photoshop and added several luminosity masks for shadows and highlights. 

This allowed me to darken a few areas, lighten specific areas, and then selectively saturate more specifics. Then I straightened the angles and removed a light pole that was in the shots and Voila!

Hey, by the way, think about joining my mail list, getting my eBook, or signing up for an online course. All that info is on this page. 

All the best!

I am so excited! After months and months my new course is ready: How to Be a Professional Outdoor & Nature Photographer

This course covers what to shoot, where to shoot, how to market, how to organize your business, how to price and negotiate sales of your images, stock photo agents, photography assignments, and much, much more. 

biz nat bannerCheck it our here.

And it is on sale right now at $79, that’s $100 OFF. Use coupon code GO79