If you are in the business of marketing your photography, then you no doubt are always on the lookout for great images that are marketable. What makes a marketable image? One that is strong on concept! So why would this be marketable? Because it exemplifies the concept of Drought, Lack of Water or Water Shortage, and more.

I was really surprised to stumble on this and it is one of the best examples I have come across for good cracked mud. In fact it might be the best example of cracked mud I have captured and I say this due to how large the cracks were and how deep they were in the mud. But better yet, you may be surprised where I found this.

cracked_mud_IMG_3581

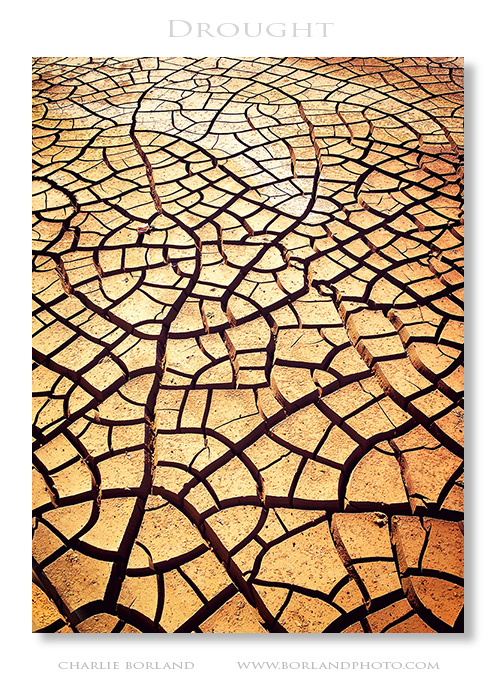
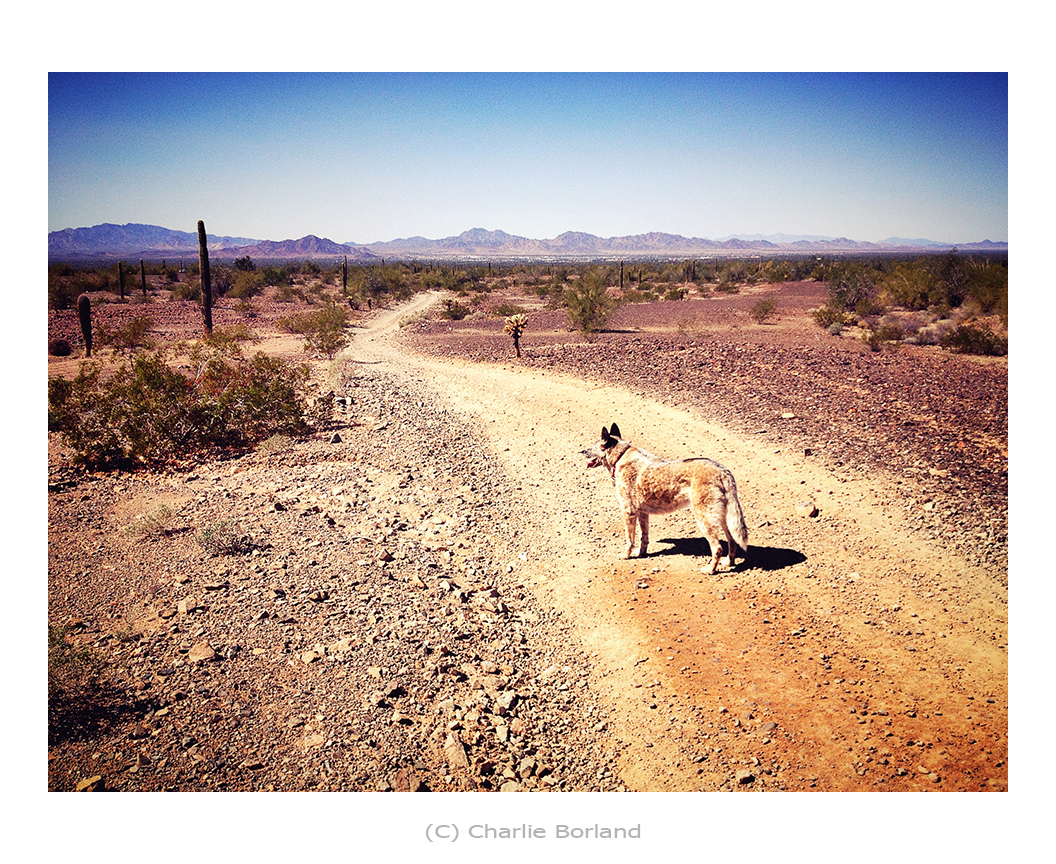
It’s not in the middle of some desert wash or a slot canyon in Utah, but instead a storm water collection ‘system’ in Yuma, Arizona. I was out for a long hike/walk with my wife and dog, following a bike/walking path when I happened to look inside this water collection basin.

It is about the size of a football field and completely enclosed to prevent access. When the monsoon rains come the flowing water collects in here and slowly dissipates, and I guess that keeps the water from flooding streets and neighborhoods. I am guessing after years of collecting that water it has accumulated about 1 foot of silt or mud so when the rains stop, it dries out and created this.

I had my iPhone (as always) and stuck my hand and phone through metal fence and began going crazy clicking away and this is one of many results. I captured various different perspectives that all used the lines flowing in various directions. I will definitely be sending this to my stock photo agent.

So the lesson is to always have a camera with you no matter what. You may just discover something unique and marketable.

If you want to learn more about selling photography, check out my online class: How to Be a Professional Outdoor and Nature Photographer

I just joined Stockimo which is an online agency for smartphone photography. I have learned to love ‘happy snappin’ with my iPhone for quite sometime.

I usually snap away where ever I am and then later open them in Photoshop and play around with the images, simply for fun. I am addicted to shooting on the fly like that. 

Then Alamy launched Stockimo and it got me thinking that while I will continue having fun shooting, I might make some money. So I got busy.

The difference between Stockimo and traditional agencies is that you cannot upload regular stock images from your dslr, they can only be from a smartphone. 

Knowing full well, that I cannot let any digital capture pass by unprocessed, I wondered how I would process the images, so I dug into the apps. There I found Mix by Camera360 and it is quite cool as well. Adobe Photoshop Mix is another app I am playing with. 

I am just now uploading pics to Stockimo to see how it goes and if I make any money I will be sure and write another post stating as such. For now here are a few of my first experiments with Stockimo. 

saguaro_IMG_3184 az_occotillo az_yellow_dog_mine_3170 dog green_onions

This is a lot of fun! 

You can join my email list on the right side, get my ebook at the link above. and if you are interested going pro, check out my online course: How to Be  a Professional Outdoor and Nature Photographer

Back light in nature and landscape photography is very effective lighting technique. When a subject is back lit the sun is in front of you or very close. I like to reference the Lighting Clock as example.

The camera is at 6 o’clock and the subject is in the middle of the clock. If the light is to either side, then it is at approximately 9 or 3 o’clock. I generally think of back light as anywhere between 10:30 and 1:30.

ca_anza_borrego_borland0309-0103

In this example from the Anza Borrego in CA, the sun is in that zone of 10-12 o’clock. What I love about this photo is that back lighting adds amazing definition to the cactus and especially the Chollas. It looks like fuzz. This approach works on many subjects, even ones that dont look so great side lit.

For processing I added a hint of contrast to make the shadows touch darker, a bit of saturation, and the sky went white which is common in back lit images due to haze and such. So I added a touch of blue back in. Then sharpened a hint as well.

Join my mail list with the signup form on the right. Get my ebook at the top, and find my amazing online photography courses by clicking any link on the right.

It is amazing what Mother Nature provides for our cameras. I looked at this scene and wondered what was happening on Earth to make all these colorful layers? The multitude of colors, i presume, means some specific mineral was ‘spewing’ all over for a while before another mineral came along. It’s fascinating! Any geologists out there?

When you think of creating great compositions, scenes like this dont make it hard. There is not only lines and diagonals adding to the composition, but the horizontal layers as well. There is contrast as well but it’s not lighting. Instead, I call it color contrast: a full range of colors both dark and light bring contrast to the scene. If it was converted to B&W it would have tonal contrast.

This is southern Utah due north of Page, AZ. Shot with a Canon 5D and 80-200mm lens

The eroded hills near Pareah, Utah   Join my mail list on the right side. Get my eBook above. Checkout my online photography course: How to Be a Professional Outdoor & Nature Photographer.

Concept!

Without a doubt concept is the biggest ingredient in a top selling stock photo. This image screams farming, agriculture, Heartland, and more, and has made good money.

 wheat farmer

I was actually on assignment for the former America West airlines when I was shooting this guys cornfield. He drove up and asked what I was up to. We chatted and later became friends and I was invited to photograph anytime I wanted including wheat harvest where we set up this photo.

It was shot before sunset so it had the golden light of the setting sun. Having them in the foreground with the combine in back added a great sense of depth. It has been on brochure covers, bank ads, and more.

ANCIENT PUEBLOAN HAND PRINT

A number of years ago I was in a remote canyon above the Colorado River in Canyonlands NP. I was with two others and one knew of this location and these hand prints. These are somewhat rare although not uncommon and are in other places. But for me it was a one-of-a-kind discovery. These were created by placing the hand against the wall and blowing paint through a straw.

petroglyph hand prints

I do not know what the meaning is nor what actually makes up the ‘paint’ but I read once it was a plant based ‘concoction’. I imagine the straw was a reed from along the river.

For processing it was pretty basic. I wanted the white paint to pop a little more so set a white point using Levels and that brightened the image so I reduced the mid tone slider to darken slightly. That layer added more pop to the image.

I am most interested in the idea of the people who lived along the river and stood right here creating these prints. One of you out there probably knows more than me so please share.

Join my mail list on the right.
Check out my ebook Outdoor Flash Photography
Learn photography with one of my online courses at www.greatphotographycourses.net


At some point a bird walked by and left these imprints on the wet sandy beach. Birds are foragers, always looking for something to eat that will sustain them. I as well am a forager, always searching for something to feed my craving to create. It’s a never ending hunger. Photography sustains me!

ca_beach_prints_b
Captured with a Nikon point and shoot and processed in Photoshop and Topaz Adjust. One of the things I do when I look at something like this is to find angles or rotate the camera to create impact to the lines that are in the scene. The footprints were going in one direction so by positioning the camera to make those footprints come from one corner up to the other, more drama is created in the composition.

Be sure and check out my eBook by clicking the link at the top. 

And I have fabulous online courses, as you can see on the right.

A couple of nights ago I was out filming and photographing in Arizona’s Kofa Mountain area. I was actually filming for a new introduction video I was making for a new place I am going to be teaching and mentoring photographers. 

My focus was on the video clips, but when the light became golden right before sunset, I had to stop filming and start photographing and this is the result. There was no adjustment to the raw file as far as color at all. This ‘sweet light’ was all natural. I only added a hint of contrast, like I almost always have to do, and a bit of sharpening. Mostly a straight shot. 

az_kofa_nwr_MG_5952

I am so excited! After months and months my new course is ready: How to Be a Professional Outdoor & Nature Photographer

This course covers what to shoot, where to shoot, how to market, how to organize your business, how to price and negotiate sales of your images, stock photo agents, photography assignments, and much, much more. 

biz nat bannerCheck it our here.

And it is on sale right now at $79, that’s $100 OFF. Use coupon code GO79

A month ago on the return trip from Canada’s NW Territories, I was zipping down the east side of Glacier NP in Montana when this event happened. The sun peeked out and I stopped, grabbed the camera and ran up a hill to get above the trees. It’s a hand-held and I started with HDR processing and applied that lightly and then did more exposure blending from the original RAW file.

The goal was to not have a sky that was over saturated and darker than the foreground or it would look unreal. I think I pushed right up to the fence so to speak as this has the look of a graduated ND filter.

mt_east_side_glacier_np_MG_6040_1_2_tonemapped


See the Photoshop layers below