Dramatically improve your flower photography by adding light from a wireless flash. If you photograph flowers, you can make them stand out by adding light from a wireless flash.

While it is not difficult to photograph flowers, like all outdoor nature photography, we are at the mercy of Mother Nature and that means we don’t always get the light we want. You can solve this problem by using a wireless off-camera flash. It can in many cases dramatically improve your photography.

When I know I am photographing wildflowers I will take my Canon 580EXII and the NPT-04 radio triggers and the Fotodiox mini lightbox to soften the light on flowers. Also, several light stands for multi-flash setups.

My strategy for lighting flowers is I want it to look REAL and not flashed because contrast looks really ugly. I usually use a 100mm macro lens for smaller flowers but today I am using a 28-70mm lens because these flowers are so big. I have set my aperture to f/5.6. and my ISO is 100.

The last thing is when you have a grouping of flowers instead this little mini lightbox won’t cover it. The solution is a larger lightbox like this 18×18 inch one. I am holding the lightbox over the flowers and the additional light brightened up these foreground flowers nicely. On this final photo I darkened the background by changing the shutter speed from 1 second to 1/4 second and that makes the foreground flowers stand out nicely.

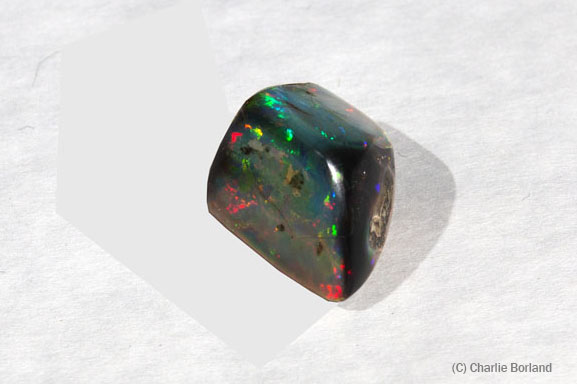
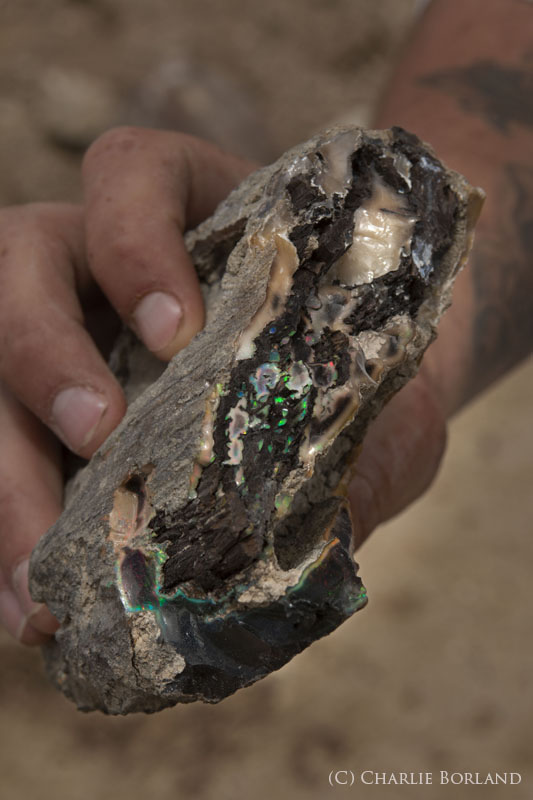
I had a really fun photo assignment last month, photographing at the Royal Peacock Opal Mine in Nevada. This mine is a U-Dig operation where anybody can visit, buy a pass to dig in the mine, and hopefully uncover some amazing Opals.

These types of assignments are always fun, not only for what I get to photograph but also for the learning. The creation of Opals is absolutely fascinating, but rather than explain it myself, here is a quick explanation:

‘Opal is formed from a solution of silicon dioxide and water. As water runs down through the earth, it picks up silica from sandstone and carries this silica-rich solution into cracks and voids, caused by natural faults or decomposing fossils. As the water evaporates, it leaves behind a silica deposit. This cycle repeats over very long periods of time, and eventually, opal is formed.’ – Opals Down Under 

What was explained to me, and I may not recall exactly, but this silica solution enters into the wood that is buried and estimated to be 12 – 15 million years old, and that wood eventually becomes petrified. Once the moisture leaves the solution, it becomes an Opal.

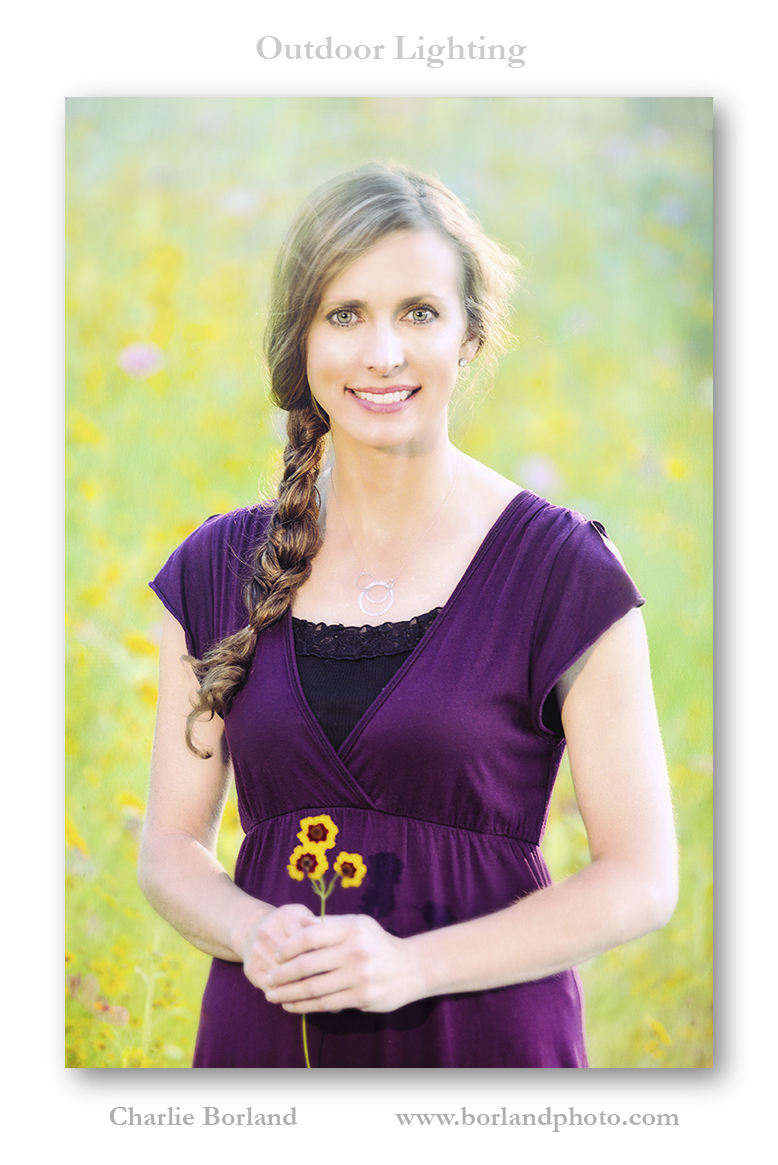
This portrait was taken last week during my Outdoor Lighting Portrait workshop at the Cascade Center of Photography. We chose to shoot at a field of wildflowers for this colorful background. The model is Kim and the purpose of this portrait example for the students was to shoot after sunset and then light the model with flash.

kim_cooney_mg_0185_pp2lo

The reason to wait for the sun to set is to reduce lighting contrast substantially, then reintroduce light by adding flash to increase lighting contrast-but contrast that I am now in control of.

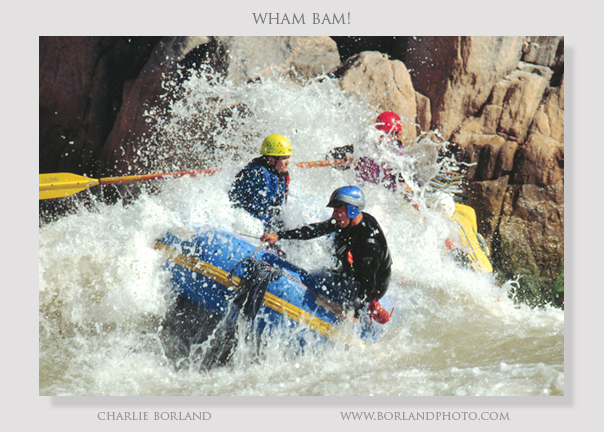
It has been a few years (too many) since my last Grand Canyon rafting trip where I shot this image. It is Granite Rapid which is pretty ‘hefty’ as you can see here. I am standing on the bank of the river and shot this with a 200mm lens.

Most of our rafts and kaykers stop and watch each boat go through one at a time, for photos and safety. There is a sweep boat ‘eddied’ out below the rapid to pick up anyone should a raft flip in the rapid, also for safety reasons. This is one of many large and powerful rapids in the Grand Canyon.

Granite Rapid, Grand Canyon

When I do a trip like this I usually am limited with the amount of gear I can take so I pack my cameras and lenses in Pelican waterproof cases. I take one tripod and one light stand and put those in a small duffel bag. I have another Pelican with flashes, storage devices, cleanibng accessories, and more as well as batteries and lots of them.

Rafting the Grand canyon is a life changing event! If you have done it you know what I mean and if you have not, add it to the bucket list. You will be glad you did!

Join my mailist, grab my ebook here, and check out my online courses on the sidebar.


Concept!

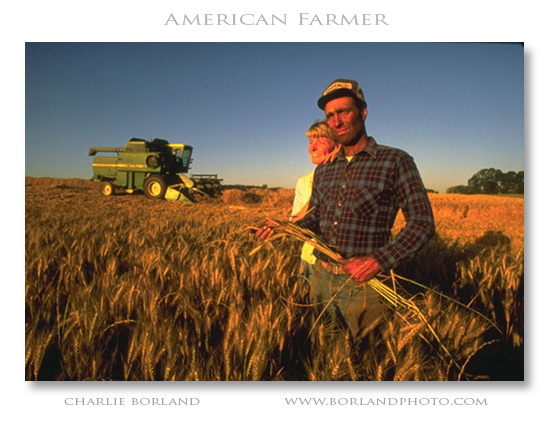
Without a doubt concept is the biggest ingredient in a top selling stock photo. This image screams farming, agriculture, Heartland, and more, and has made good money.

 wheat farmer

I was actually on assignment for the former America West airlines when I was shooting this guys cornfield. He drove up and asked what I was up to. We chatted and later became friends and I was invited to photograph anytime I wanted including wheat harvest where we set up this photo.

It was shot before sunset so it had the golden light of the setting sun. Having them in the foreground with the combine in back added a great sense of depth. It has been on brochure covers, bank ads, and more.

op_flash_1

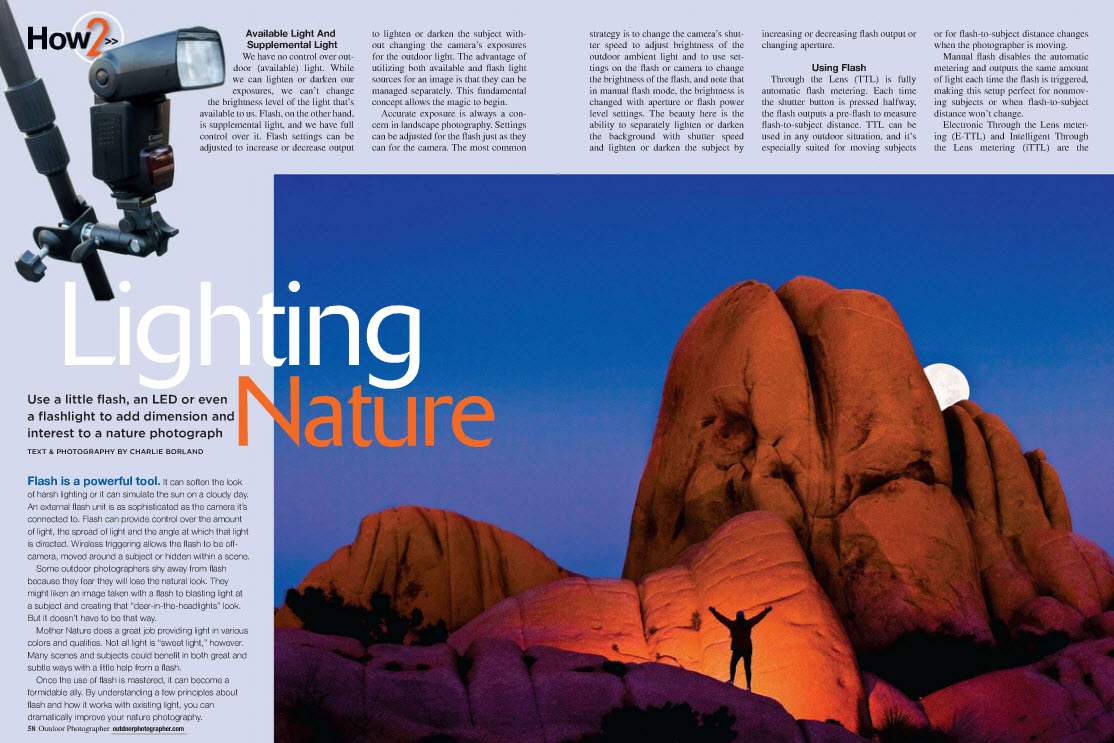
I am thrilled to see the September issue of Outdoor Photographer and my article: Lighting Nature which is based on my eBook: OUTDOOR FLASH PHOTOGRAPHY. In May they asked me to write this piece on how to use a flash in nature photography and I was of course, thrilled and honored to contribute to the magazine. 
 
You have to buy the issue to read the article but here is a link to a Photo Tip based on the same article if you want to learn about flash photography outdoors here.
 
If you want to see my eBook go here.
 

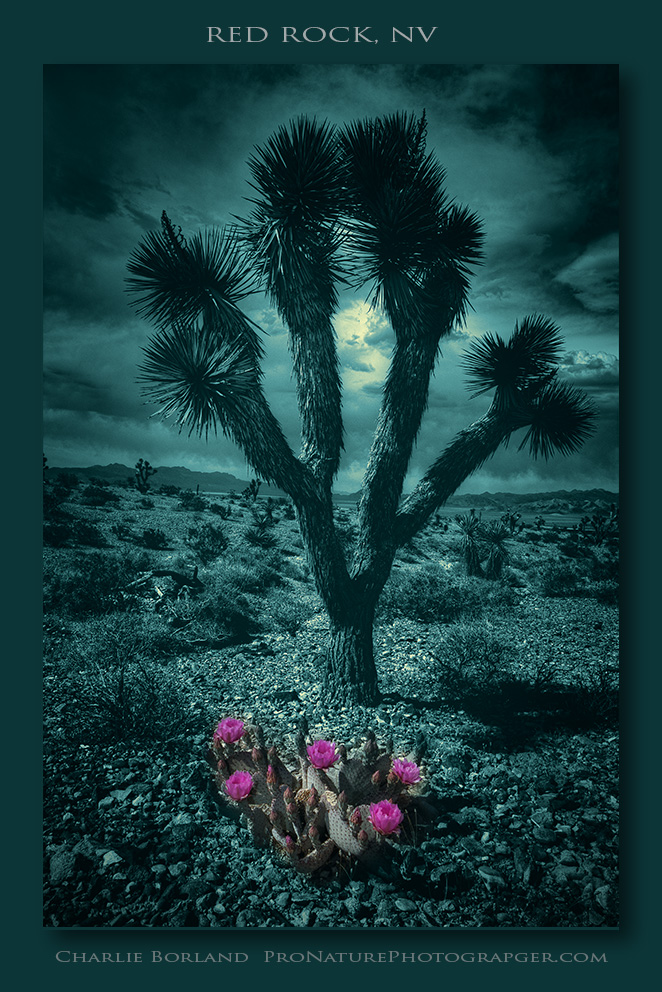
I photographed this image at Red Rock Conservation Area, North of Las Vegas, about 6 weeks ago. I was zipping down the road from Mt. Charleston when I spotted the cactus starting to bloom. I guessed that I was about 1 week to early for full bloom, but I was not going to be here in a week, so I shot anyway.

I used a flash to fill in the shadows on the cactus and that worked great. But since it was 4 pm the light was not that great yet, so when I opened the image in Photoshop it looked like a basic snap. That’s where the fun begins. You get started and you never know where you are going in creating. Are these images ever DONE? No, they are abandoned when you are happy with the results.

I always bracket exposures so the first thing I did was HDR process it with the only intention to add drama to the clouds. Then I opened Topaz B&W Effects and used the Cerulean set to colorize the image. Once I got here I decided I had what I wanted and subsequently ‘abandoned’ this image to go start the process all over another. If you want to know about Topaz, here’s the link: http://www.topazlabs.com/aff/idevaffiliate.php?id=196

Get my book on Outdoor Flash Photography below…..

The large Lupine are out and they look great! I shot this one in a shaded forest using flash in a light box to add shape to it and create separation from the background.
I shot it in the Columbia River Gorge for a magazine assignment which I will announce in the fall when it is published.The exposure was F/4 @ 1/200 with a 580EXII flash and Fotodiox mini box.
You can see my eBook: Outdoor Flash Photography here.

Flash is such a great tool for all photographers, indoors and out. While most of the imagery I shoot using flash is fairly close to the camera, there is occasionally a subject much further from the camera and flash where the light from the flash just does not get there.

Flashes all have a set range where they can send enough light for proper exposure, but due to the inverse square law, that light reaches a distance where the light falls off. Think or throwing a ball! For a while the ball travels at speed for a certain distance before beginning to drop as that speed slows down.

Keeping all this in mind is important when photographing. Just how far can the subject be before the light won’t reach? It varies on many factors such as how powerful the flash is. The more powerful the further light goes. A Canon 580EXII has a greater range than the

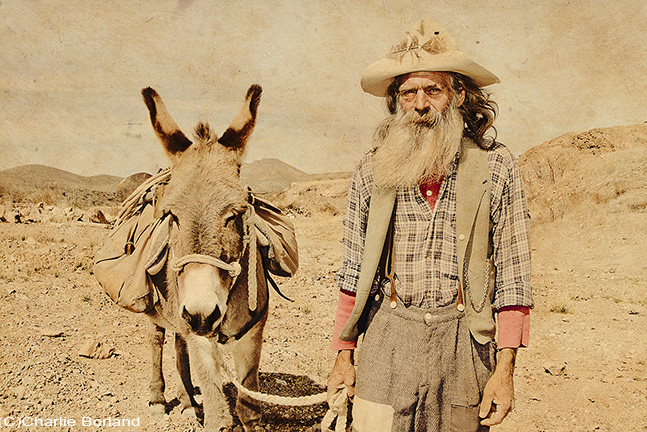
This past spring I was enjoying quite a bit of time wandering and photographing the Arizona deserts and mountains. While down in the desert I was stunned when I came across this old miner in the desert with his donkey.

We started talking and I asked what he was doing down here in the middle of nowhere. He told me he was the Lost Dutchman Miner of the infamous Lost Dutchman mine. He continued by telling me that he was truly lost in his attempt to relocate his mine.

I replied that he was a long way from the Superstition Mountains, where history suggests the mine is located. He did not comment obviously fearing if he said anything I might start searching for the mine myself. This got me thinking that the mine might not be in the Superstitions after all.

He asked if I had anything to eat as all he had to eat for sometime was beans and hardtack. I happened to be carrying in my camera bag a crab salad sandwich from Subway and one of my favorite beers: McTarnahan’s from Portland Brewing, and it was still ice cold.

I told him I would give him the sandwich and beer if he posed for a picture and so he did not move as I grabbed this shot. I did use flash fill because the sun was high noon and created the shadows in the eyes.

He scarfed down the sandwich and guzzled the beer (I don’t think he liked it. Never had a beer like that) then without saying a word, headed off into the sunset so to speak, in search of the Mother Lode. I grabbed my gear and went looking for the mine.

In Photoshop,