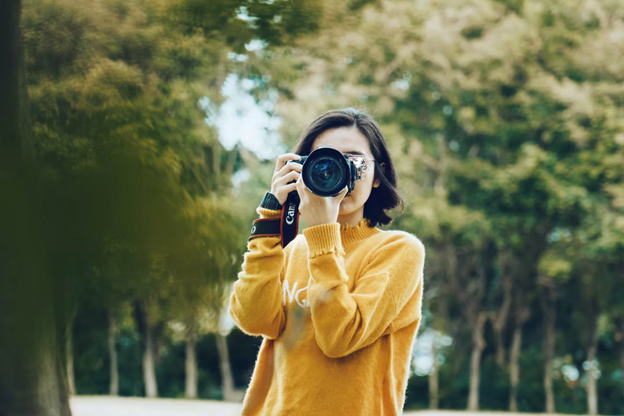
by Tina Martin

Source – Unsplash


They say that a picture is worth a thousand words, so it is important to take the best photos possible. While many of us envision ourselves as good photographers when we snap shots with our cell phones, there is nothing quite like having a great picture that was taken by a professional. Here at Great Photography Courses, we pride ourselves on taking outstanding images of events and outstanding portraits, so we have some reasons why you should hire a professional photographer for your next important event.

Why Do You Need a Pro?

Yes, we all have cameras on our phones and they get more advanced with every new smartphone that is released, but that still doesn’t compare to the shots taken by photographers.

One of the reasons for this is that professionals have the best equipment that puts most phones to shame and they know how to use it. The fact is that if you take every single picture with the same lens, you are not going to get the quality images that you are hoping for. Photographers understand this, which is why they have a large selection of lenses and filters that they can use for any given application. That way you are sure to get the best photo.

Professional photographers also understand the science of shadow, light, and angles. They know that they have to stand in a certain spot to get the best picture and they also know where their subject should be so they can be seen in the best light. Basically, photographers know all of the tricks that lead to the most awe-inspiring photos. If you cannot do that yourself, then you should spend the money on a professional.

When You Need a Photographer

There are some instances where you absolutely need a professional to take the best photo. One example is when it comes to taking pictures of your newborn baby or younger child. We all know the struggles of trying to take photos of a baby. It can be near impossible to get them to stay still for long enough to get the shot, and even if you do, you may not be using the best filter or lens to get the most high-quality image possible. A professional photographer knows exactly what to do to make this process a piece of cake.

You should also consider hiring a professional photographer when you are taking product pictures for your business for advertisements and promotional materials, especially if you intend to create a Facebook ad and want to make the best impression possible on your potential customers. A professional photographer understands the balance of lighting, subject, angle, and proportion that can ensure your commercial images are beautiful and captivating the first time. Commercial photos are often unique because they focus on a particular feature of the product and you will need that to be perfect.

Professional photographers are also best when taking photos of your home when you place it on the market. After you have made updates to get the house ready for sale, like upping your curb appeal and removing clutter both inside and out, hire a pro to get great shots of your home in pristine condition. They will know tricks to get the best perspective on a room when space is limited, and they will get the lighting just right to make your home look warm and inviting.

Considerations When Finding a Photographer

When it comes time to find a professional photographer, you will need to find the best person for the job. Go online and do your research as you look for photographers in your area and look at the reviews from previous customers to ensure that it is a reputable company. You should also ask for a price quote to ensure that you are getting a deal that fits within your budget.

When you talk to the photographer, mention the type of event that you need them for. It is important because the complexity of the pictures will determine how involved the production may be. So, real estate photos may take less legwork than a full family photo shoot. If you are still unable to find the best photographer, then ask for referrals from family and friends.

As you can see, there are some important factors that go into hiring a professional photographer. It can all seem a little overwhelming at first, but with a little research, you will find the perfect fit.

Great Photography Courses can teach you how to light an interior without the scene looking lit, how to find a storytelling angle, how to deal with poor light, how to fix bad color, how to work fast to be more profitable, and a whole lot more. Let us know if you have any questions!

Here’s a photo from Pt. Imperial where I made the journey from outside the park to the rim before sunrise.  It was a perfect morning with pretty clear skies.

I took the photograph before sunrise at 6:40 am which was 13 minutes before sunrise. When shooting pre-sunrise, if you start early when the alpenglow type light is evident, you have less contrast compared to the minutes before the sunrise.

When photographing wide-angle landscapes, often the goal is to make sure everything is in sharp focus. The reason is that usually, we do not like to look at out of focus areas of our scenes. While that shallow depth of field can be a powerful technique to get viewers to look at something in your composition that deserves all the attention, wide-angle landscapes can be more powerful when everything is sharp.
 
Looking at this scene, from Oregon’s Willamette National Forest, you see a scene using a great depth of field. But stop for a second and think about what your end goal would be for this scene. Is there anything you would want in focus and the rest out of focus?
 
The foreground maple leaves are probably what I would call the ‘star of the photo’ so they should remain in focus. In this case, the background could be thrown out of focus and that would support the approach of forcing viewers to look at the foreground maple leaves.
Making the background sharp and throwing the foreground maple out of focus would only create visual chaos because the foreground maple is so large in the frame. That big out of focus maple creates a visual roadblock that stymies viewers who want to look through the scene to the background.
 
The answer is to use the Near/Far technique of making sure everything is in focus. This supports the foreground elements and the background as the two areas of the scene are more visually in-sync.
 

I had a really fun photo assignment last month, photographing at the Royal Peacock Opal Mine in Nevada. This mine is a U-Dig operation where anybody can visit, buy a pass to dig in the mine, and hopefully uncover some amazing Opals.

These types of assignments are always fun, not only for what I get to photograph but also for the learning. The creation of Opals is absolutely fascinating, but rather than explain it myself, here is a quick explanation:

‘Opal is formed from a solution of silicon dioxide and water. As water runs down through the earth, it picks up silica from sandstone and carries this silica-rich solution into cracks and voids, caused by natural faults or decomposing fossils. As the water evaporates, it leaves behind a silica deposit. This cycle repeats over very long periods of time, and eventually, opal is formed.’ – Opals Down Under 

What was explained to me, and I may not recall exactly, but this silica solution enters into the wood that is buried and estimated to be 12 – 15 million years old, and that wood eventually becomes petrified. Once the moisture leaves the solution, it becomes an Opal.

As I was hiking the desert this last winter, I spotted an area where rain had collected and created this pattern. What I thought was very interesting was how the mud was totally wet and then following the cracks, totally dry. It made for a nice composition was my feeling and I shot it with an iPhone.

az_quartzsite_IMG_5075

But you can see by this pre-processed image below, the photo would not work without some good processing since it was totally flat looking.

I think Death Valley is SO amazing!

I have photographed in every state in the lower 48 and while our country has the most amazing diversity of landscapes, for me Death Valley is the most unique!

Just my humble opinion!

I have been there more times than I can count and there is always something new. On my last trip, I was driving a road when I spotted the pitch black, almost coal colored geology in the far distance. So I hiked down there and photographed some variety of scenes, all under an overcast sky.

ca_death_valley_artist_area_MG_5864b
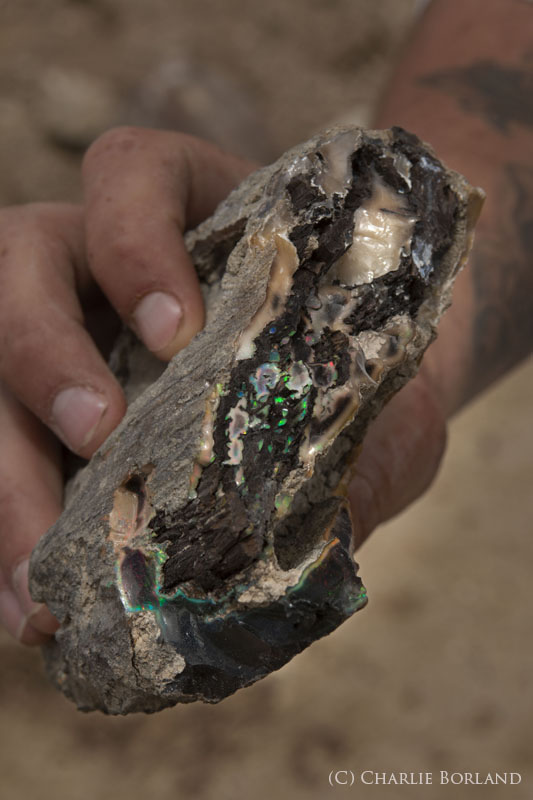
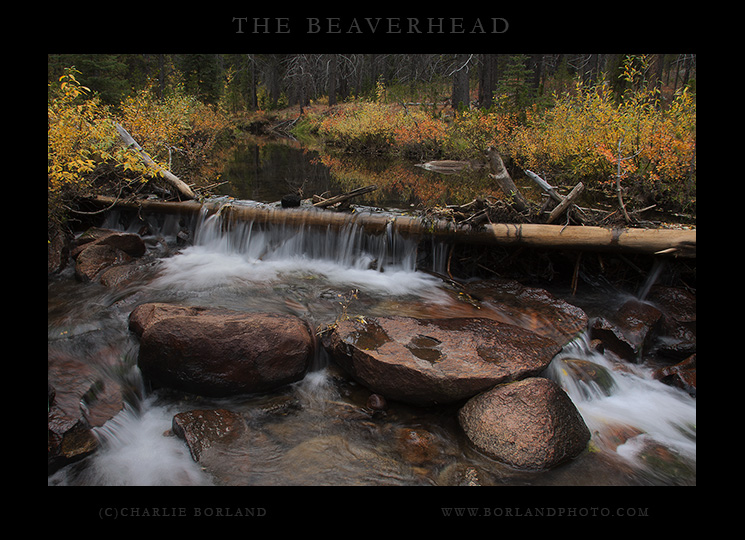
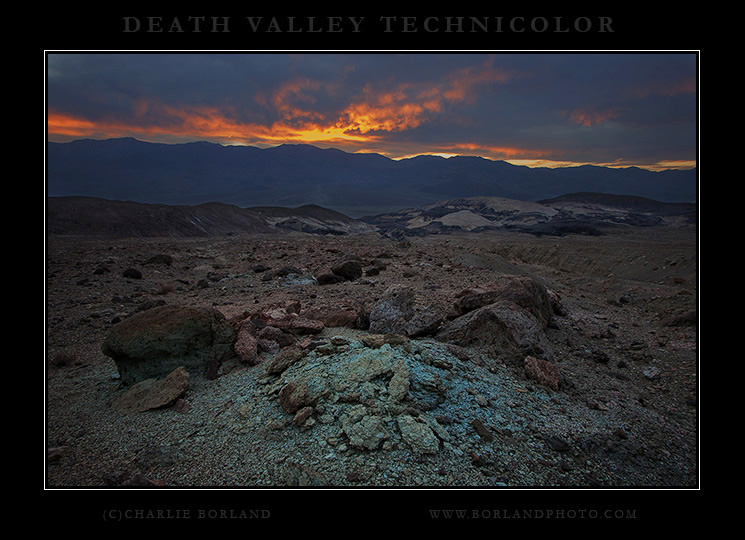
When the sun was setting (before the color show) I started back when I stumbled on this scene of turquoise colored sediment. I have no idea what it was (I am not a geologist) but I knew it would make for a great foreground.

The flowers are out and while I have only hit this location in western AZ, near the CA border, I am hoping to head to the Superstition Mountain and search for their wildflowers soon.

az_dome_rock_mtns_MG_0781

Canon 70D 28-70 f/16 set to 28mm

I zoomed in on this landscape a little. rather than go real wide and the reason is that the foreground flowers are not that close together. But standing further back and zooming slightly, I was able to stack teh flowers and make them look more condensed.

For processing, I am now a big fan of Sean Bagshaw’s Luminosity Mask system where I can select individual sections of an image based on tonal values, or colors, and process each of those individually and it works great.

Check out my ebooks and online courses on the right sidebar. 

Watch my Nature and Landscape Photography webinar.

On a trip through Montana, I went into the Beaverhead NF to explore the ghost town of Coolidge.

While the ghost town was not that photogenic, Elkhorn Creek was lined with some great color.

This fallen log was jammed with debri creating a cascade in the creek. Throw in the rocks and you have a nice balance of blurred water, the still creek leading you to through the picture, and the lines of the colorful willow.

Elklhorn Creek in Beaverhead NF Montana.
Elkhorn Creek in Beaverhead NF Montana.

For processing, I used luminosity masks to add detail to the flowing water by darkening it slightly. Then selecting the colorful willows and bumping contrast and saturation, selectively.

Finally, I selected the green forest in the background and darkened them to allow the colorful willow stand out more.

Checkout my eBook, online courses, on the right sidebar.

Related Posts: HDR and Exposure Blending in Glacier NP, Compositing 6 of Me Into One Image

This is a fall color mosaic of maple leaves that I setup. They were on a lawn and spread unevenly, so I arranged them to fit the frame to my liking.
 

While some might feel this is not nature photography because it is arranged, it sold as a stock photo a couple times including a cover. So who cares, right?

maple_leaves_026475
 
I truly believe if you are in the business of pro photography, that you Make photographs, not just Take photographs.